That shocking $1,000 bill isn’t just for a piece of glass; it’s a hidden ‘precision tax’ on safety systems that are deliberately locked down by manufacturer software.
- Minor impacts and simple part swaps require expensive, dealer-level recalibration due to millimeter-sensitive technology.
- Seemingly simple DIY repairs, like replacing a side mirror, are often blocked by proprietary software that requires coding the new part to the car.
- In Quebec, insurance coverage for the mandatory calibration portion of a repair is not always guaranteed, creating a potential out-of-pocket ‘calibration gap’.
Recommendation: Your most effective defense against these high costs is proactive maintenance of your sensors and immediate repair of any windshield chips to avoid a full, system-disrupting replacement.
I see it every day. A customer comes in with a small crack in their windshield, expecting a straightforward, reasonably priced repair. Then I have to give them the estimate, and their jaw drops. A thousand dollars? For a piece of glass? The shock is real, and it’s completely understandable. The common explanation you’ll hear is that “modern cars are just more complex.” While true, that doesn’t even begin to tell the whole story. It doesn’t explain the frustration or the feeling of being trapped.
The truth is, the high cost isn’t just about the advanced cameras and sensors of your Advanced Driver-Assistance Systems (ADAS). It’s about the ecosystem built around them. It’s a world of what I call “software handcuffs,” where manufacturers control who can perform repairs, and a “precision tax,” where even the slightest physical disturbance demands a costly, specialized electronic reset. These systems are designed for safety, but their repair process often feels like it’s designed for profit.
But what if the key to managing these costs wasn’t just accepting the high price, but understanding exactly where the money goes and what you, the owner, can actually control? This isn’t just about the technology; it’s about the processes, the insurance fine print specific to Quebec, and the proactive steps you can take to prevent a small problem from becoming a four-figure headache. We’re going to break down why these systems are so sensitive, what you can and can’t do yourself, and how to navigate the financial side of keeping your car’s safety features working as they should.
For those who prefer a visual summary, the following video provides a great overview of why this calibration process is so critical for modern vehicle safety.
To fully grasp the challenges and solutions related to these advanced systems, this guide explores every angle, from the technical reasons behind high costs to the practical steps you can take to manage them. The following sections will provide a clear roadmap to understanding your vehicle’s ADAS.
Summary: Navigating the High Cost of ADAS Repairs
- Why Do Radar Sensors Need Recalibration After a Fender Bender?
- Lane Warning vs Lane Keeping: What Is the Difference in Hardware?
- The “System Unavailable” Message: Dirt, Snow, or Broken Sensor?
- Why You Cannot Swap a Side Mirror With Blind Spot Monitoring at Home?
- How to Clean Ultrasonic Parking Sensors Without Damaging Them?
- How to Avoid Paying $400 for Camera Calibration After a Glass Chip?
- How to Keep Your Radar Sensor Clear of Slush on Long Trips?
- Do Collision Avoidance Systems Actually Lower Your Insurance in Quebec?
Why Do Radar Sensors Need Recalibration After a Fender Bender?
The main reason a minor fender bender can lead to a surprisingly expensive repair bill is what I call the “precision tax.” Your car’s forward-facing radar, which controls systems like adaptive cruise control and automatic emergency braking (AEB), isn’t just a simple sensor. Think of it like the scope on a high-powered rifle; if it’s off by even a single millimeter at the source, the error becomes massive at a distance. This isn’t an exaggeration—it’s physics.
The precision required is staggering. A fender bender that barely leaves a mark on your bumper can easily knock the radar’s mounting bracket. Analysis shows that over 100 feet, a 1-millimeter sensor shift can cause the radar’s focal point to be off by several feet. This means your car might see an obstacle in the wrong lane or, even worse, fail to see one directly in front of you. Driving without recalibration isn’t just risking a warning light; it’s actively driving with a compromised safety system that could make a wrong decision at a critical moment.
This is why recalibration is not an upsell; it’s a non-negotiable safety procedure. It involves setting up precise targets in a controlled environment and using a diagnostic tool to tell the car’s computer exactly where “straight ahead” is again. That process requires a trained technician, a large, clear workshop space, and expensive equipment—all factors that contribute to that final, shocking bill. It’s the price of a system that needs to make life-or-death decisions in milliseconds.
Lane Warning vs Lane Keeping: What Is the Difference in Hardware?
A lot of drivers use the terms “Lane Warning” and “Lane Keeping” interchangeably, but from a technician’s standpoint, they are worlds apart in terms of hardware, complexity, and repair cost. Understanding the difference is key to understanding why one repair might be a few hundred dollars while another easily crosses the $1,000 threshold. A Lane Departure Warning (LDW) system is a relatively simple, passive safety feature.
Its job is to watch the lane markings. It uses a forward-facing camera, usually mounted on the windshield, to see the lines on the road. If you drift over a line without signaling, the system gives you an alert—a beep, a light, or a vibration in the steering wheel. That’s it. It’s a spotter. It doesn’t take any action. A Lane Keeping Assist (LKA) system, on the other hand, is an active system. It doesn’t just watch; it intervenes. To do this, it needs more than just a camera.
LKA systems integrate the camera with your car’s electric power steering. When it detects you drifting, it doesn’t just beep; it applies a gentle steering input to nudge you back into the center of the lane. This requires more sophisticated software for real-time trajectory calculation and, critically, a more complex calibration process (often involving both static and dynamic tests) to ensure its steering inputs are safe and accurate. The image below shows the typical mounting for these advanced camera systems, whose complexity grows with the system’s capabilities.
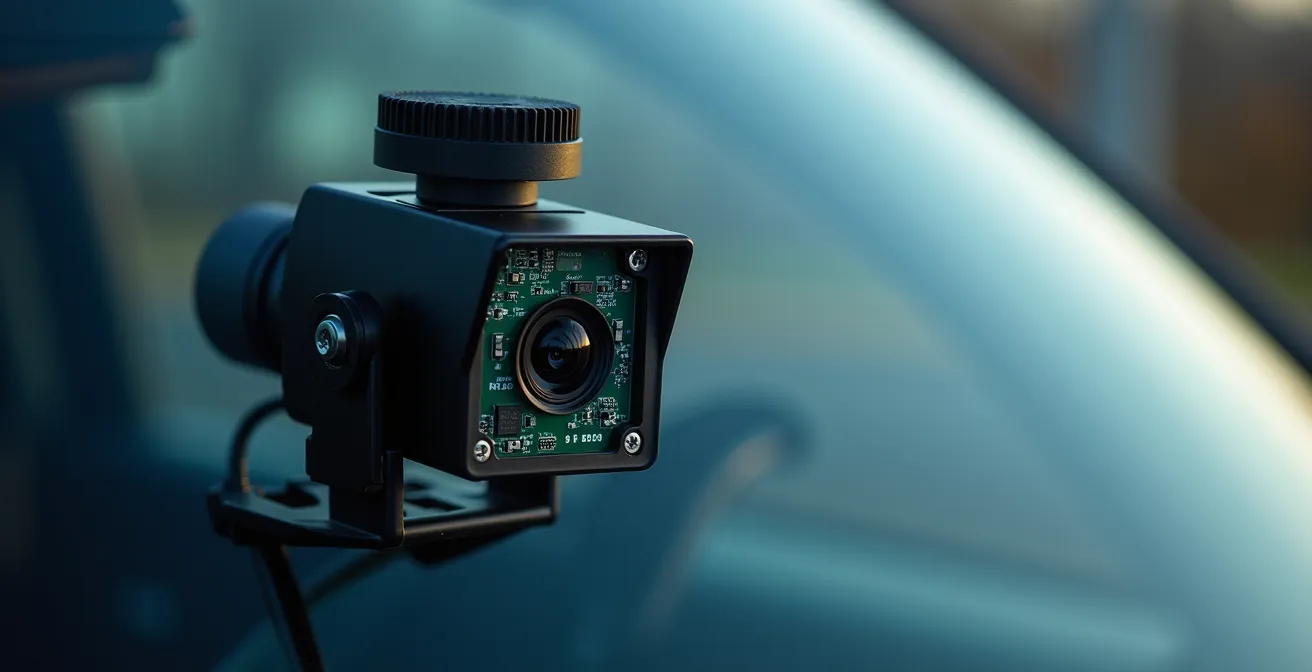
As you can see, the hardware is intricate. This difference in hardware and software directly translates to repair costs. As the following table illustrates, replacing a component for a “keeping” system is significantly more involved and expensive than for a simple “warning” system.
The hardware requirements dictate not only the function but also the cost of repair, as detailed in this comparative analysis of ADAS hardware.
| System Component | Lane Warning | Lane Keeping |
|---|---|---|
| Primary Sensor | Forward-facing camera only | Camera + radar integration |
| Steering Integration | None – audio/visual alerts only | Electric power steering actuators |
| Processing Requirements | Basic image recognition | Real-time trajectory calculation |
| Calibration Complexity | Static calibration only | Static + dynamic calibration |
| Typical Repair Cost Range | $300-600 | $600-1,200 |
The “System Unavailable” Message: Dirt, Snow, or Broken Sensor?
That dreaded “ADAS System Unavailable” or “Front Radar Blocked” message on your dashboard is a common sight during a Quebec winter, but it can pop up any time. My first piece of advice is always the same: don’t panic and don’t immediately book a costly diagnostic appointment. More often than not, the cause is simple and something you can fix yourself in minutes. The sensor’s view is simply obstructed.
The most common culprits are environmental: a layer of slush or ice covering the front radar sensor (often hidden in the grille or lower bumper), mud splattered over a parking sensor, or even heavy rain or thick fog that the camera or radar can’t see through. Before you even think about the dealership, do a walk-around. Look at the camera area at the top of your windshield and all the small, circular ultrasonic sensors on your bumpers. Is there anything obviously blocking them? Sometimes, even condensation inside the windshield camera housing can trigger the error, which might indicate a failing seal but is worth checking first.
If a simple cleaning doesn’t resolve the issue, you can take your troubleshooting a step further before paying for a professional diagnosis. Dealerships in Quebec typically charge a $150+ diagnostic fee just to plug in their computer. For a fraction of that price, a good quality OBD-II scanner can read the same fault codes, telling you if the car is reporting a specific sensor failure. This information is invaluable and can help you determine if it’s a real hardware problem or just a persistent obstruction.
Your Action Plan: Troubleshooting ADAS ‘System Unavailable’ Messages
- Visual Inspection: Check all sensor surfaces (windshield camera, bumper radars, parking sensors) for obvious obstructions like snow, ice, or thick mud.
- Moisture Check: Look for any signs of moisture or condensation inside the camera housing on the windshield, which could point to a seal failure.
- Gentle Cleaning: Use a soft cloth and an appropriate cleaner (like washer fluid) to gently wipe all sensor and camera lenses. Never use an abrasive brush or high-pressure washer.
- Note the Timing: If the message persists after cleaning, pay attention to when it appears. If it’s immediate upon starting the car, it’s more likely a hardware failure. If it appears after driving a while, it could be an alignment issue.
- Fault Code Scan: Before paying for a dealership diagnostic, use a personal OBD-II scanner to check for any stored ADAS-related fault codes (e.g., “Lost Communication with Camera Module”). This can pinpoint the problem area.
Why You Cannot Swap a Side Mirror With Blind Spot Monitoring at Home?
This is one of the most frustrating realities for DIY-savvy car owners, and it perfectly illustrates the concept of “software handcuffs.” Years ago, replacing a broken side mirror was a simple mechanical job: a few bolts, a wiring clip for the power adjustment and heater, and you were done in 30 minutes. Today, if that mirror contains a Blind Spot Monitoring (BSM) sensor, the job has become infinitely more complex, not because of the mechanics, but because of the software.
The price difference for the part alone is staggering, with some OEM blind spot mirrors costing upwards of $900 compared to $150 for a standard version of the same mirror. But the real barrier is what comes after you bolt the new part on. The new mirror’s BSM module is an unknown component to your car’s main computer (ECU). It needs to be electronically introduced, or “coded,” to the vehicle’s network. Without this software handshake, the system will simply not work, and you’ll be left with a permanent warning light on your dash.
This coding process requires proprietary diagnostic tools and software that only dealerships and highly specialized, licensed shops have access to. It’s an intentional barrier created by manufacturers to control the repair process. As one expert puts it, the challenge is no longer just mechanical.
The main barrier isn’t mechanical but software-based, requiring proprietary tools to ‘code’ the new mirror to the car’s ECU.
– ADAS Technical Specialist, in an Auto Insurance Industry Report
So, while you might be perfectly capable of physically swapping the mirror, you are locked out of the final, critical step. This is the reality of modern vehicle repair: your mechanical skills are often secondary to a shop’s access to licensed software.
How to Clean Ultrasonic Parking Sensors Without Damaging Them?
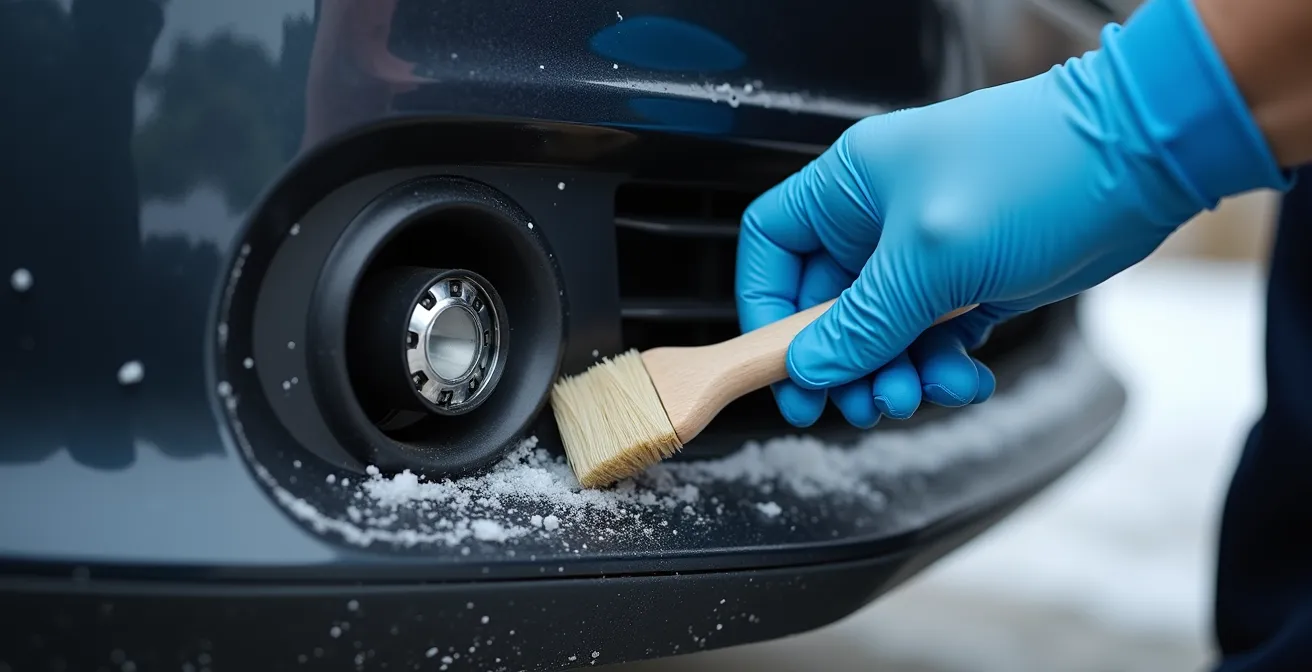
While some ADAS repairs are locked behind software, basic maintenance is not. In fact, proactive care is your best weapon against false alerts and unnecessary service visits. Ultrasonic parking sensors—those small, circular discs on your bumpers—are particularly vulnerable to dirt. They work by emitting sound waves and measuring the echo. A layer of road grime, salt, or even a thick coat of wax can muffle these signals and cause the system to malfunction, either by not detecting an obstacle or by beeping constantly.
The key is to clean them correctly. These sensors have a delicate membrane that can be damaged by harsh chemicals or high pressure. Never use a pressure washer directly on them, and avoid aggressive degreasers or solvents. These can compromise the sensor’s seal, allowing moisture to seep in and cause permanent failure. The right approach is gentle and methodical, using materials you likely already have.
Think of it as cleaning a pair of glasses, not scrubbing a dirty floor. A soft-bristle brush (like a detailing brush) and mild car wash soap are your best friends here. The goal is to lift the dirt off without scratching the surface or forcing water into the housing. Regular, gentle cleaning, especially during our messy Quebec winters, can prevent a majority of parking sensor-related false alarms.
Here is a safe and effective protocol for keeping these critical sensors in perfect working order:
- Start with a pre-rinse using a low-pressure stream of water from a garden hose to remove loose dirt.
- Mix a solution of mild car wash soap and lukewarm water. Avoid dish soap or household cleaners.
- Dip a soft-bristle detailing brush or a clean microfiber cloth into the soapy water.
- Gently agitate the surface of the sensor in a circular motion to lift away any stubborn road salt or tar.
- Rinse again with a low-pressure stream of water.
- Dry the sensor with a separate, clean microfiber cloth to prevent water spots, which can also interfere with sensor performance.
How to Avoid Paying $400 for Camera Calibration After a Glass Chip?
The single most effective way to avoid that huge bill for a windshield replacement and the accompanying camera recalibration is painfully simple: fix a chip the moment you see it. The $400+ calibration fee is only necessary when the camera’s physical position is disturbed, which happens during a full windshield replacement. If the original glass and the camera’s mounting bracket remain untouched, no recalibration is needed.
A windshield chip repair is a completely different process. A technician injects a clear resin into the chip, which then hardens and restores the structural integrity of the glass, preventing the chip from spreading into a large crack. The windshield is never removed. This procedure is fast, effective, and dramatically cheaper. According to reports from Canadian auto glass shops, the cost is typically between $80 and $150 for a chip repair, compared to the $800 to $1,500 or more for a full ADAS-equipped windshield replacement. Many insurance policies in Quebec will even cover the cost of chip repairs with no deductible, as it saves them a much larger payout down the line.
Ignoring a chip is a costly gamble. A change in temperature or a jolt from a pothole can turn that tiny star into an unrepairable crack overnight, forcing a full replacement. Furthermore, trying to save money by having the glass replaced without the proper recalibration can have serious safety and financial consequences, as a cautionary tale from another province shows.
The Cautionary Tale of the Uncalibrated RAV4
A notable case study from a collision center in Edmonton highlights this risk perfectly. A 2020 Toyota RAV4 had its windshield replaced, but the shop skipped the ADAS recalibration to lower the initial cost. Shortly after, the customer noticed the lane departure system was malfunctioning. When a claim was filed for the follow-up calibration, the insurer denied it because it wasn’t part of the original approved estimate. The repair shop was ultimately forced to absorb the entire cost of the recalibration themselves, a clear lesson that cutting this corner benefits no one.
How to Keep Your Radar Sensor Clear of Slush on Long Trips?
For anyone driving in Quebec from December to March, the “Front Radar Blocked” message is an all-too-familiar travel companion. The mix of snow, salt, and grime creates a thick slush that loves to cake onto the front of your car, blinding the very sensors designed to keep you safe on slick highways. While you can’t stop the winter, you can be prepared to deal with it quickly and safely on the road.
Pulling over on the shoulder of the 40 to wipe your sensor with a glove is not a great plan. The key is preparation. Having a small, dedicated kit in your car can turn a frustrating, potentially dangerous stop into a 30-second fix. This isn’t about fancy tools; it’s about having the right, soft materials that won’t scratch the sensitive lens of your radar or camera. Remember, a scratched sensor is a permanently damaged sensor. Studies show there is a 50% reduction in front-to-rear crashes with properly functioning AEB systems, so keeping that sensor clear is not just for convenience, it’s for survival.
Your winter emergency kit should have a few basics, but for an ADAS-equipped car, it needs a few specific additions. A standard, hard-bristled snow brush is great for windows but terrible for sensors. You need a gentler touch. A quick spray and wipe is often all that’s needed to restore the system’s vision and get you back on your way safely.
Here are the essentials for a Quebec Winter ADAS Emergency Kit:
- A dedicated soft-bristle snow brush to be used only for clearing snow from sensor areas and the grille.
- A pack of clean microfiber cloths that can wipe away slush without scratching the plastic sensor covers.
- A small spray bottle filled with -40°C rated windshield washer fluid for melting ice and cleaning grime quickly.
- (Optional but recommended) A silicone-based water repellent (like Rain-X for Plastic) applied to the sensor before a trip to help slush slide off more easily.
- A small, powerful LED flashlight to help you inspect the sensors properly during dark, snowy conditions.
Key Takeaways
- The high cost of ADAS repairs stems from the need for millimeter-perfect calibration and proprietary software, not just the parts themselves.
- Proactive maintenance, like cleaning sensors and immediately repairing windshield chips, is the most effective way to control costs.
- In Quebec, ADAS insurance discounts exist but don’t negate the potential for significant out-of-pocket expenses if calibration isn’t explicitly covered in your policy.
Do Collision Avoidance Systems Actually Lower Your Insurance in Quebec?
This is the ultimate question that brings the entire cost-benefit analysis full circle. After dealing with the high costs of maintenance and repair, drivers rightfully want to know: do I at least get a break on my insurance for having all this safety tech? The answer in Quebec is yes, but it’s a nuanced “yes” with important details in the fine print.
First, it’s crucial to understand the split in Quebec’s auto insurance system. The SAAQ (Société de l’assurance automobile du Québec) provides the public plan that covers bodily injury for all Quebec residents, regardless of fault. Your private insurer covers damage to your vehicle and others’. Because the SAAQ rates are fixed, ADAS systems have no impact on your public plan premiums. The discount comes from your private insurer, on the portion of your premium that covers collision or upset.
Private insurers do recognize the value of this technology. According to the Insurance Bureau of Canada, Quebec insurers may offer up to a 15% discount on the collision portion of a premium for vehicles equipped with autonomous emergency braking (AEB). However, this discount applies to only one part of your total premium and may not offset the increased repair costs over the vehicle’s lifetime. The “calibration gap” is a real risk, where your policy might cover the windshield replacement but have ambiguous language about the mandatory electronic recalibration, potentially leaving you to pay that part out-of-pocket.
The table below breaks down how coverage works between the public SAAQ plan and your private policy, a distinction every Quebec driver should understand when evaluating the total cost of ownership for an ADAS-equipped car. This information is based on guidelines from the Insurance Bureau of Canada (Quebec).
| Coverage Type | SAAQ Public Plan | Private Insurance |
|---|---|---|
| Bodily Injury | Fully covered | Not covered |
| Vehicle Damage | Not covered | Covered with premium |
| ADAS Discount Available | No – fixed rates | Yes – up to 15% |
| Minimum Liability Required | N/A | $50,000 |
| Calibration Coverage | Not applicable | Varies by policy |
Now that you understand the technology, the maintenance, and the insurance landscape, the path to managing these costs is clearer. It requires a shift in mindset from being a passive vehicle owner to a proactive one. By inspecting your sensors, addressing windshield chips immediately, and asking your insurer pointed questions about calibration coverage before a repair is needed, you can reclaim control and mitigate the sticker shock of keeping your modern car safe on the road.